Monday, May 9, 2011

FINAL BLOG RELFECTION!!!

All the projects that we have coverd in class are fortune cookies, tumblers, wheel throwing, and making candle holders. Making fortune cookies was our first project that we made in class and learning how to make something. For the tumblers and candle holders what i learned was building a shape and cutting clay and learning how to put it all together without falling apart. Wheel throwing is learning how to throw on the wheel to make pots and bowls all at once instead of putting pieces together. The project I liked the best was wheel throwing because I learned how to make a bowl and cups. Yes I would recommend this class to someone else becuase you can have fun and learn how to make different things on the wheel and by hand and you have a great teacher named LISA.:) What I expect to learn from this class was learning how to make bowls, cup, or something that would look cool at my house. Yes I did learn something about myself that I didn't already know. The project that taught me the most new concepts was wheel throwing. The project that I would like to do that we didnt do was learning how to make pots and pans. What I learned from the process of making art is that it is fun and relaxing to do. I felt that the wheel throwing process at first was difficult to do and then as I tried and tried I got the hang of it and learned to making bowls!

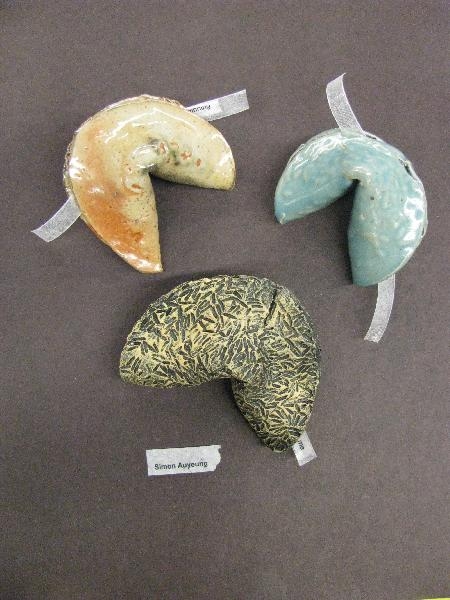
(I Used Green Sapphire) glaze
(I used Massengers Gold glaze)

(I used Jack's black glaze)


What I was trying to accomplish was to learn how to make bowls on the wheel. Yes I did accomplish my goal becuase I made 6 wonderful bowls while on the wheeel. I techinque I used on to make these bowls was to be gentle with them and not hugging the clay. The elements of design I used is the shape of the bowl becuase the three blacks ones fit inside of each other from biggest to smallest (left to right on pic. Black bowls) I see this becuase my bowls came out perfect and look great! The best part of these pieces was making the bowls and glazing them whatever color I wanted them to be. What I liked best about what I made was it was made with my own to hands in class. What it's strength is that it can stand on its own without falling down. The most challenging part of the piece was to not have it break on you when you are making it on the wheel and centering. How iI overcame these difficulties was to be gentle with it when making it. I would not improve or change anything if I were to do this project over again. What I learned from creating these pieces was that I learned how to make bowls. Overall I felt good about my pieces becuase they turned out the way I had wanted them. I will miss POTTERY CLASS AND THE BEST POTTERY TEACHER LISA ROGERS AND THAT I HAD A FUN 2ND SEMESTER IN YOU CLASS LEARNING HOW TO BUILD THINGS AND CHOOSING MY OWN COLORS IN GLAZING EACH PIECE.

Tuesday, March 8, 2011

Monday, March 7, 2011

Reflection of learning-- Quarter Final Blog =)

All the projects covered in class was the fortune cookies, 2 candle holders, 2 tumblers water etched and 2 tumblers with the black sgraffito. What I learned from the fortune cookie project was to enjoy the new year with our own fortune that we wrote and then placed it into the cookie. What I learned from the candle holders was to cut the shape out and then build it. Also with the candle holders was it was more of a pratice so that we can be ready for the tumblers which is bigger than the candle holders. For tumblers we had to do 2 water etched and 2 black sgfafftto where you carved into the cup. The project I liked the best was the fortune cookies becuase it was easy to make and we didn't have to carve into it like the black tumbers and candle holders. Yes I would recommend this class to someone else because it is a fun class that you can build stuff in and that you can have the best teacher named LISA. What I expected to learn from this class is to learn how to make pots and to see how it has the glazed and texture on it when it is fired and all ready. Yes I learned something about myself  that I didn't already know is that the stuff I make is my own master piece that I did in Pottery class. The project that taught me the most new concepts is wheel throwing because it is easier to make pots than building them by hand. The project that I would like to do that we didn't do is to make tea cups, regular cups, and plates.

Pictures of Tumblers and candle holders: For the candle holders and tumblers I glazed them to late before they went into the gas klin on Thursday so these are pictures of them in their glazes and not fired:
Candle holders in glazes
black sgraffito in glazes
water etched tumbers in glazes

Wednesday, March 2, 2011

Wednesday, February 23, 2011

Wheel Throwing Directions!! =)

We are learning to wheel throw!!! Not an easy process!! :)


Wheel throwing steps:


  1. Wdedged up 3 one pounds of clay
  2. Form the clay into coned shape (make sure hands are wet at all times)
  3. Do the electric monkey on the clay on the wheel (Pull the clay towards you and lean towards clay)
  4. In the second picture(top pic) compress the clay and don't use your tumbs. (Check for center by using the needle tool **Gently touch the clay)
  5. In the 3rd picture(top pic) cross your tumbs and hug the clay
  6. In the 4th picture(top pic) look in the mirror and and watch the people in the elevator so that it moves up and down.
  7. Use your middle finger to put in the opening. (2nd image, 4th picture)
  8. To open the clay have both hands on the top and gently open it with your middle finger.
  9. Pull forward to open up the clay
  10. Gently compress the floor to see if it is thick enough. Use needle tool to help.
  11. Volanco Thoms hang Dong on the clay when you make the opening wider.  
  12. Comprass the rimb so that it is smooth and thick.
  13. Have your thumb towards four O'clock to comprass rim
  14. Use two fingers on thumb and pinch side
  15. Next you use two fingers to pull up the clay so that it is thin.
  16. Finger full the clay up
  17. Stiff the clay so that it looks even
  18. Lock + slide the rim
  19. Use your fingers to pull up the clay
  20. Use your rib only to make the outside of the cup smooth
  21. When your done making the pot use water and run a wire through the bottom of the pot to get if off the wheel. (Do it fast or it will stick again and dry hands off)
  22. Make Sure the walls are even
  23. When done put your finished piece on a ware borad and then on your shelf.
  24. Clean up or make another when finished and have fun!!!
  25. 

Friday, February 18, 2011

Tumblers =)

We are maiking tumblers!! This is my black sgraffitto tumbler!!


These are my tumblers that are water etched!!


Reflection:
What I was trying to accomplish is to make four tumblers total, two water etched and two black sgraffitto. Yes I did accomplish my goal because I finished my four tumblers and done my designs on both of them. The techinque I used in my water edched is my very own design I got from my head that I painted on the bone dry cup and for the black sgraffito I used a bird image from the internet that I carved into the cup. The elements of design I used on my water etched was circles, lines, triangles, rechangles, and a zig zag line. For the black sgraffitto I used lines, circles, etc.. is where I see these elements. The best part of the piece was putting the tumblers together without it falling apart and not standing up stright. What I liked about the piece I made was that I made them myself with some help putting it together. The thing in strenght is that I made them and out my own design into the tumblers. The most challenging part of creating the piece was building four tumblers and letting two dry out completely and having two of them not completely dry so that we can paint the black into it and carve our design into it. Also the most challenging part was re-building one of the tumblers because the bottom collpased and couldn't be fixed and trying to carve into the black tumbers so that it doesn't bone dry. I overcame these difficulties by coming in and re-building my tumblers and paint the water etched tumblers and to paint and carve the black sgraffitto so that it doesn't dry out and not be able to carve into it. What I would change if I were to do this project again is to make three tumblers, 2 water etched and one sgraffitto so that it would be easier. What I learned from creating this piece is to not let the one your painting the black on dry too much or you can't carve into it. I will apply this knowledge in creating my next piece is to start on the building the water etched pieces first so that I can let it dry and then build the black sgraffitto let it dry out for a bit and then paint it and carve into it immedity so it doesn't dry out and be too hard. Overall, I felt good about this piece because I finished it in on time by working on it on my off hours and finished it on time. :) The graffitto was the hardest ones to complete because they had to look the same and have the same design and everything! :)

Thursday, February 10, 2011

Candle Holders!! :)

This is my candle hold with the black gerofido! I tried the best i could to create the picture. Candle Holder with the black greffido


Candle holder-Water etched!!

We are making candle holders!

Reflection:

What we were trying to accomplish was to make 2 candle holders one water ediched and one with the black griffedo. Yes i did accomplish my goal because I finished both of my candle holders even though my water ediched one broke the first time. The technique I used on my pieces was my own design and did the best I could to create these pieces. The elements of design that are most evident in my work was that I used mown ideas and pattens on both candle holders. You see them on the cups. The best part of the piece was to make the cups by building it by hand. What I liked about the best piece I made was I did it by myself with some help. In strenght about my pieceis that it can stand up. The most chanllenging part of creating the piece was not making it thin enough so that I can put it together and not letting the black one dry too much so that I couldn't carve into it. I over came the difficulties by trying to save it dunking it in water and re-painting it and carve in it the best I could and rebuilding the water one that broke on me. What I would do to change if  iI were to do this project over again is the piece is not having to the black carving into the cup because it was hard to do it. WhatI learned from creating this piece was that  putting our own creative into the cups and in what ways make it look cool. I will apply this knowledge when creating my next piece is to use my own ideas into my own art work. Overall, I felt okay about this piece becuase it wasn't my best on the black one since it turned out funny ad didnt have alot of detail in it since I didn't know. :( I tried my best in finishing both pieces during my off hours.  The sgraffitto was the hardest to complete since my dryed out.. :(

Wednesday, January 26, 2011

Fortune Cookies :)

Picture of my finished fortune cookies with the glazes and the black air brushed one! The left picture is my fortune cookies with out the glazes.


We are making fortune cookies for the Chinese New Year, the year of the rabbit on Febuary 3, 2011. We are exploring different clay bodies and we will glaze each if them.I did accomplish my goal because I finished the fortune cookies before Chinese New Year and in the display case by confrenences. The techniquies that I used was we glazed two of them one in Shino and one in Celdon. We did one of them on dry brushing by trying to match our cookies to the actual cookie. The elements that I used to make the cookie was to design it the best I can to make it look like a actual fortune cookie. I see them when I am making the cookies with the texrures by adding the rice to it. The best part of the piece was being able to make the cookies, play with the clay, and being abble to build something. What I like about the best that I made was that it was made by me and not anyone else. I bulit it with my own two hands. The strenght is that I am able build pots and being able to have fun in pottery class. The most challenging part of creating the piece is to make it look just right without having it break on you or fall apart. I over came these difficulties by making more and trying harder. What i would improve if I could change this project again is nothing. What I learned from creating this piece is knowing why we put the fortune into the fortune cookies so that we can believe in ourselves. I would apply this by always believing in myself for the art I created myself and the stuff I try to do. Overall I felt good about this piece becuase it was the very first thing that I created in potter class. I am proud that I an Chinese to celebrate the Chinese New Year with my family.